How to Hold a Pencil for Drawing (and When Sketching): The Artist's Grip
You were taught to hold a pencil for writing, not drawing. The two grips are not the same. Here is how artists hold a pencil for control, flow, and lighter, cleaner lines.

To hold a pencil for drawing, stop using the tight grip you were taught for writing. Hold the pencil loosely between your thumb and the side of your index finger, gripped further back from the tip, so the movement comes from your arm and shoulder instead of your fingers. Keep your hand relaxed and your pressure light. That single change, a looser hold further back from the point, is what gives you the longer, freer, more controlled lines that make drawing feel easy instead of stiff.
Here is the thing almost no one tells beginners: the way you hold a pencil to write is actively working against you when you draw. Writing wants small, tight, controlled marks made with the fingers. Drawing wants fluid motion that starts at the shoulder. So the frustration you feel, the heavy lines, the smudges that will not erase, the cramped and lifeless sketches, is usually a grip problem, not a talent problem. Fix the grip and a surprising amount of the struggle disappears on its own.
How do you hold a pencil for drawing?
Hold the pencil loosely between your thumb and the side of your index finger, further back from the tip than you would for writing, and let your fingers relax. The reason is mechanical. When you choke up near the point and squeeze, every line is driven by tiny finger movements, which produces short, stiff, scratchy marks. When you grip further back and loosen up, your hand stops doing all the work and the motion can travel up into your wrist, elbow, and shoulder, where long, flowing lines actually come from.
A light hand also reads as a relaxed hand, and relaxed is exactly what you want. If you finish a drawing session with a little graphite or charcoal smudged on the side of your hand, that is usually a good sign. It means your grip was loose, your strokes were gliding across the page, and your hand was truly connected to the drawing instead of clenched above it.
There are two grips worth knowing, and good artists move between them constantly:
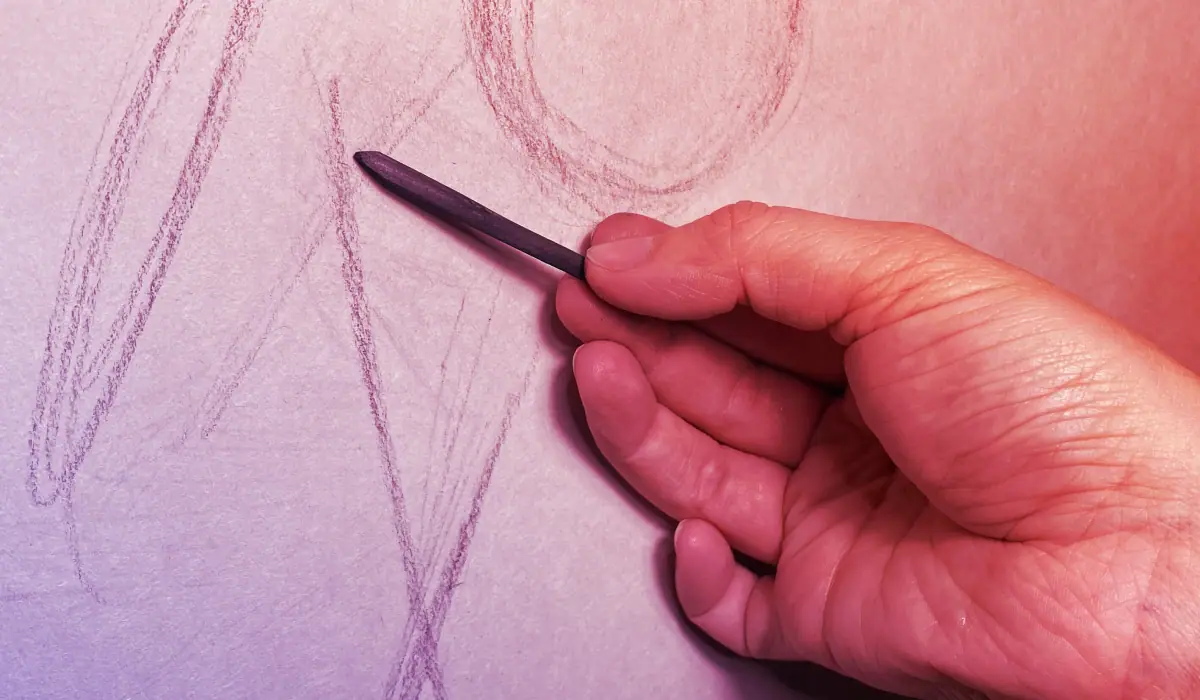
- The overhand grip, for loose work. Lay the pencil flat under your palm with your fingers draped over the top and your thumb steadying it from the side, so the tip points down at the paper. This hold keeps your wrist out of the way and forces the motion into your arm, which is perfect for blocking in big shapes, sketching gesture, and shading broad areas with the side of the lead.
- The tripod grip, held further back, for detail. This is closer to a writing hold, pencil resting between thumb, index, and middle finger, but with two key differences for drawing: you grip noticeably further back from the tip, and you keep the whole hand loose. Use it when you move from rough shapes into refining edges and small details.
Neither grip is the right one for the whole drawing. You start loose and overhand, then tighten toward the tripod as the work gets more precise.
How should you hold a pencil when sketching?
When sketching, use a loose grip held well back from the tip and keep your pressure light so your early lines stay soft and adjustable. Sketching is the searching phase of a drawing, where you are still finding the shapes, so you do not want dark, committed marks yet. A relaxed overhand hold lets you sweep in the big forms quickly with your arm, testing proportions and angles without locking anything down.
Think of those first sketch lines as scaffolding, not as the finished drawing. They are there to be moved, layered over, and corrected. If you sketch with a tight grip and heavy pressure, every wrong line becomes a permanent, smudgy commitment you have to fight later. Sketch loose and light, and the drawing stays open and forgiving while you figure it out.
Why shouldn’t you hold a drawing pencil like you write?
You should not draw with your writing grip because writing and drawing are two different physical skills that need two different holds. The writing grip is tight, sits right at the tip, and is powered by small, precise finger movements. That is genuinely the right tool for forming tiny letters in a controlled way. It is the wrong tool for drawing, where you want range, flow, and the ability to make a long, confident line in one motion.
Hold a drawing pencil the way you write and you import all of writing’s limits: short strokes, stiff lines, a hand that tires quickly, and proportions that drift because you are working from such a cramped position. The fix is not to try harder with the same grip. It is to change the grip. Loosen your hand, slide your fingers back from the tip, and let the bigger muscles in your arm take over the long lines while your fingers handle only the smallest details.
Does posture matter when drawing?
Posture matters more than most beginners expect, because where your body is locked determines where your line can move. Hunch over a flat table and your motion collapses into your wrist, your view of the page is severely foreshortened, and your proportions distort without you noticing. Drawing is closer to a full-body activity than a hand activity, and your setup either frees your arm or traps it.
Two changes make a real difference:
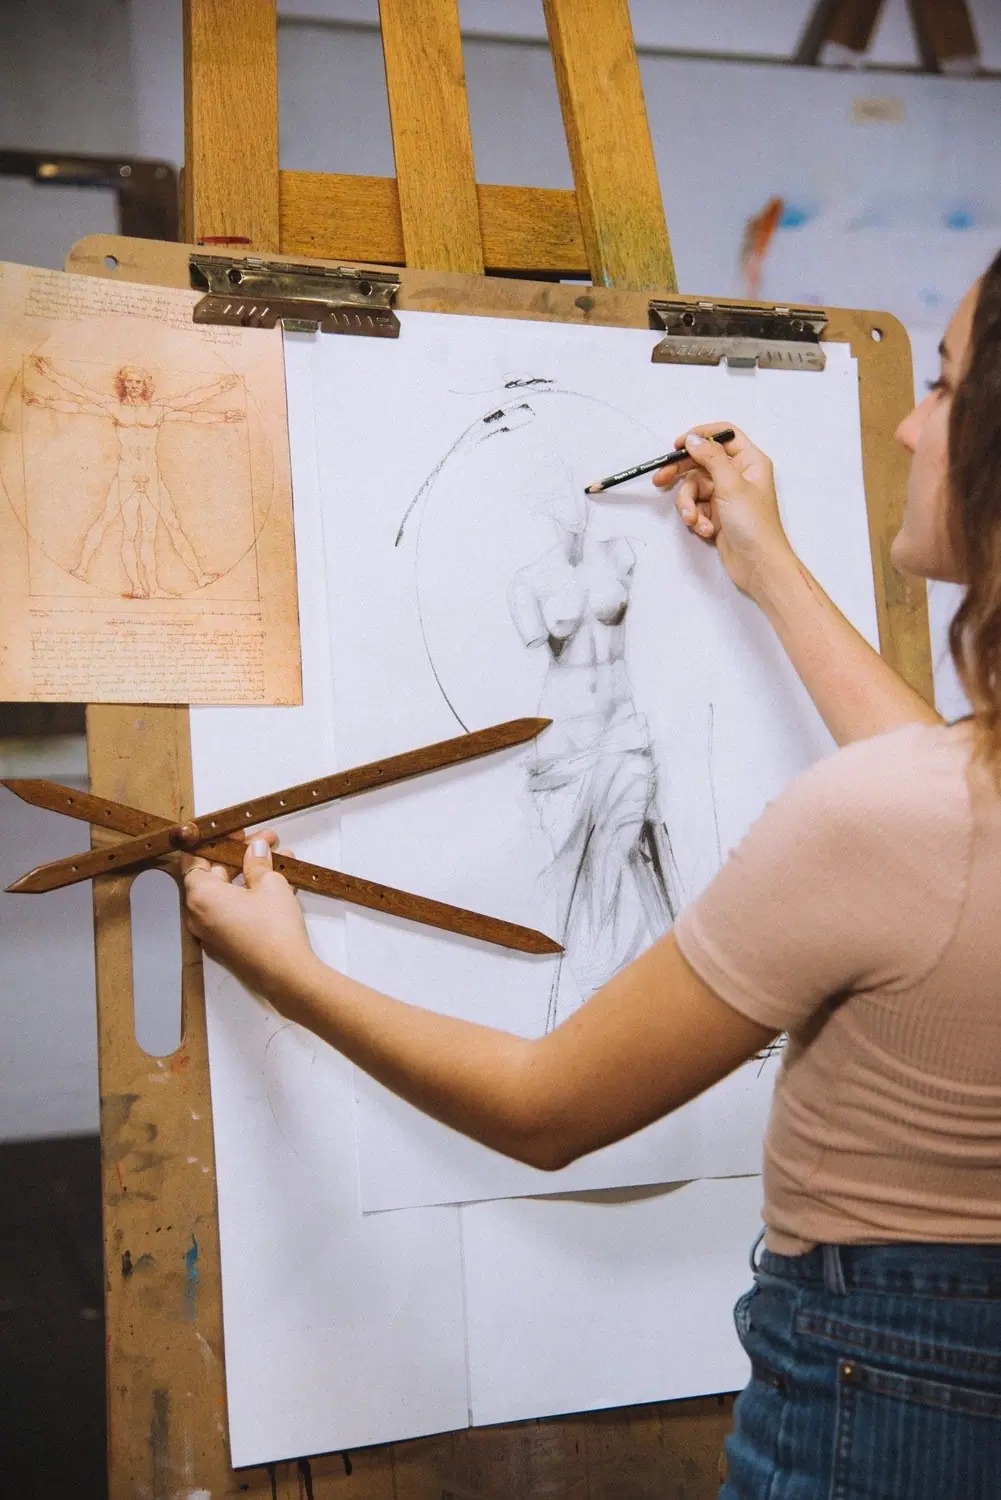
- Sit or stand upright. Whether you are standing or perched on a backless stool, keep your back upright and your body relaxed but engaged. An open posture lets your arm move freely from the shoulder, which is where great drawing motion begins.
- Put your paper on an upright or angled surface. Drawing flat on a desk distorts what you see and shrinks your range of motion. An easel, a drawing board propped at an angle, or anything that brings the paper closer to vertical lets you see your work honestly and move your whole arm across it.
You do not need an expensive studio to get this right. A cheap tabletop easel or a board leaned against a stack of books is enough to change how your lines feel almost immediately. If you are assembling your first kit, our guide to essential art supplies covers what is genuinely worth buying early.
How hard should you press the pencil?
Press lightly, especially at the start, and save the heavy pressure for shading and refining later. Your earliest lines are foundations you fully intend to adjust, so they should be soft, light, and easy to erase or draw over. Pressing hard from the first stroke is one of the most common beginner mistakes, because it carves the wrong lines permanently into the paper and makes the whole drawing harder to correct.
Build the drawing in layers instead. Lay in light, gentle marks to establish the big shapes and check that everything is in the right place. Only once the structure is right do you start adding pressure: darkening edges, deepening shadows, and building up the values that make a drawing feel solid. This light-to-heavy approach is the same logic behind subtractive drawing, where you pull light back out of a toned surface, and it is exactly how controlled, confident drawings get built, gradually and intentionally, rather than all at once.
How do you practice the artist’s grip?
Practice the grip directly, away from any finished drawing, until the loose hold feels natural. The point is to retrain a habit your hand has held since you first learned to write, and that only happens through repetition, not understanding. A few minutes of deliberate practice will move you faster than reading another article.
- Draw big ovals from the shoulder. Tape a sheet to an upright surface and fill it with large, light ovals, keeping your fingers still and moving only from the arm and shoulder. This teaches your body where drawing motion is supposed to come from.
- Practice keeping it light. Fill a page with soft lines, gripping further back than usual, and challenge yourself to keep every line erasable. If you can wipe the whole page clean easily, your pressure is right.
- Switch grips on purpose. On one small sketch, block in the shapes with the overhand grip, then refine the details with the tripod grip. Feeling the handoff between the two is how you learn when each one helps.
These fundamentals carry straight into the rest of drawing. Once your grip and posture are working for you, the next thing to train is your eye, which is where guides like the 7 elements of art and learning how line creates movement come in. Beyond the mechanics, there are real cognitive benefits of drawing that make the practice worth keeping, and when you are ready to put the grip to work on a real subject, how to draw a self-portrait is a good first project.
Learning to hold a pencil correctly looks like a small thing, and it is, which is exactly why it is so worth fixing. It is the kind of quiet fundamental that frees everything built on top of it. If you want to turn these basics into a real drawing habit with structure and feedback, our free Two Week Challenge is a guided way to start making art instead of just reading about it. For more on building skill from the ground up, the rest of the oil painting techniques collection is here when you want to keep going.
Frequently asked questions
How do you hold a pencil for drawing?
Hold the pencil loosely between your thumb and the side of your index finger, gripping further back from the tip than you would for writing. Let your hand stay relaxed so the movement comes from your arm and shoulder rather than your fingers. This loose, further-back hold gives you longer, freer lines and far better control than a tight writing grip.
How should you hold a pencil when sketching?
When sketching, use a loose overhand or tripod grip held well back from the tip, and keep your pressure light. Early sketch lines should be soft and easy to adjust, not dark and committed. A relaxed hold lets you block in big shapes quickly with sweeping arm motions, then tighten up only when you start refining.
Why shouldn't you hold a drawing pencil like a writing pencil?
The writing grip is tight, close to the tip, and driven by small finger movements, which is good for tiny controlled letters but bad for drawing. It produces stiff, cramped, heavy lines and tires your hand. Drawing needs motion from the whole arm, so you hold the pencil looser and further back to get fluid, expressive strokes.
Should you press hard or light when drawing?
Press light, especially early. Your first lines are foundations you will adjust, so keep them soft and easy to erase or draw over. Save heavier pressure for later, when you are shading and refining and actually want darker, committed marks. Building a drawing in light layers gives you far more control than pressing hard from the start.
Does posture matter when you draw?
Yes. Sitting hunched over a flat table locks your motion into your wrist and distorts what you see on the page. Sitting or standing upright with your paper on an easel or angled surface frees your arm to move from the shoulder and lets you see your drawing without foreshortening it. Good posture quietly improves both your line and your proportions.
What to practice this week
- Tape a sheet to an upright surface and draw twenty large ovals using only arm and shoulder motion, keeping your fingers still, to feel where drawing movement should come from.
- Hold the pencil further back than usual and fill a page with light, soft lines without pressing hard. Practice keeping every line erasable until the page feels gentle.
- Switch between the overhand grip for loose blocking-in and the tripod grip for fine detail on the same small sketch, so you learn when each one helps.
Supplies used

About the author
More from Elli