Proportional Divider: What It Is and How to Use One for Drawing
The proportional divider is one of the simplest accuracy tools an artist can own. It looks like handle-less scissors, and it lets you draw anything you can see, larger or smaller, in correct proportion.

A proportional divider is a measuring tool that keeps your drawing in correct proportion to whatever you are drawing from. It looks like a pair of scissors without handles, with a sliding pivot in the center. The small end measures your reference, the large end measures your drawing, and the pivot sets the ratio between them. Once you learn to use it, you can draw anything you can see, larger or smaller, and keep it in scale. That is the whole promise, and it is a real one.
Most people treat drawing accurately like a gift you are either born with or not. It is not. Accuracy is mostly a matter of seeing relationships correctly and measuring them honestly, and the proportional divider is the tool that makes that measuring fast. Milan Art Institute has handed this tool to thousands of beginners, and the same thing happens almost every time: the drawings get tighter, the proportions get right, and the student stops guessing. If you want to understand why measuring matters so much, the 7 elements of art gives you the underlying grammar this tool serves.
What is a proportional divider?
A proportional divider, sometimes called a scale tool or scale divider, is a measuring instrument that helps artists keep a drawing in proportion with a reference. Its only job is accuracy: it ensures that what you draw stays true to the scale and relationships of your subject. The tool itself is simple, with two arms that cross at a movable pivot, but that simplicity is the point. It does one thing extremely well, which is to compare a distance on your reference with the matching distance on your drawing.
Because both ends represent the same object at different sizes, the divider quietly removes the guesswork that derails most beginner drawings. You are no longer eyeballing whether the head is too big or the gap between two features is off. You are measuring it.
When do artists use a proportional divider for drawing?
Artists use a proportional divider any time they want to draw accurately, which in practice means any time the relationships in a subject have to be right. The short version is whenever accuracy matters. The longer version takes a little understanding of what accuracy actually is. A believable drawing depends on the relationships between things: the lines, the gaps, the positive and negative space, and how each part sizes up against the others.
Take a face. If you want to draw a person well, the eyes have to be in proportion to the nose, the nose to the lips, and all of it to the outer edges of the face. Get one of those relationships wrong and the likeness collapses, even when every individual feature is drawn beautifully. The proportional divider keeps those ratios honest, both between the parts of your subject and between your reference and your drawing. If faces are where you are headed, our guide on how to paint eyes leans on exactly this kind of careful measuring.
It works the same way no matter the size of your drawing. If you are working from a photo and your drawing is larger or smaller than that photo, the tool still keeps everything to scale. Measure on the reference, transfer to the drawing, and the proportion holds.
How do proportional dividers work?
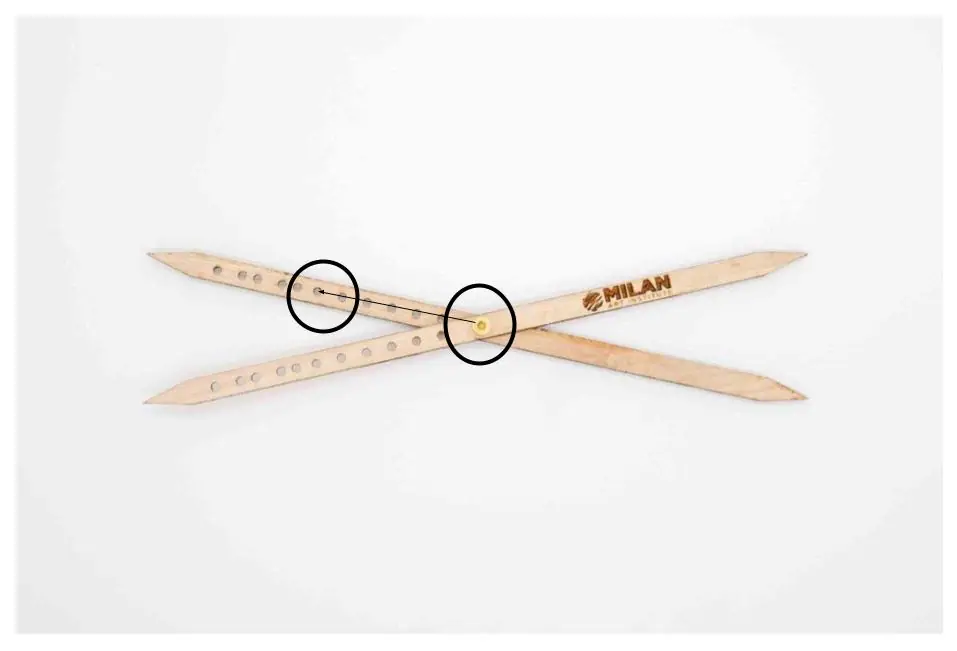
A proportional divider works by linking two measuring ends through a single sliding pivot, so a distance on one end always equals a fixed ratio of the distance on the other. The tool looks a bit like scissors without handles. In the center sits a pivot point made from a nut and bolt, and there are holes or a slotted track along one side of the arms that let the pivot move.
You set the ratio by sliding that nut and bolt up or down. Here is how the three basic positions behave:
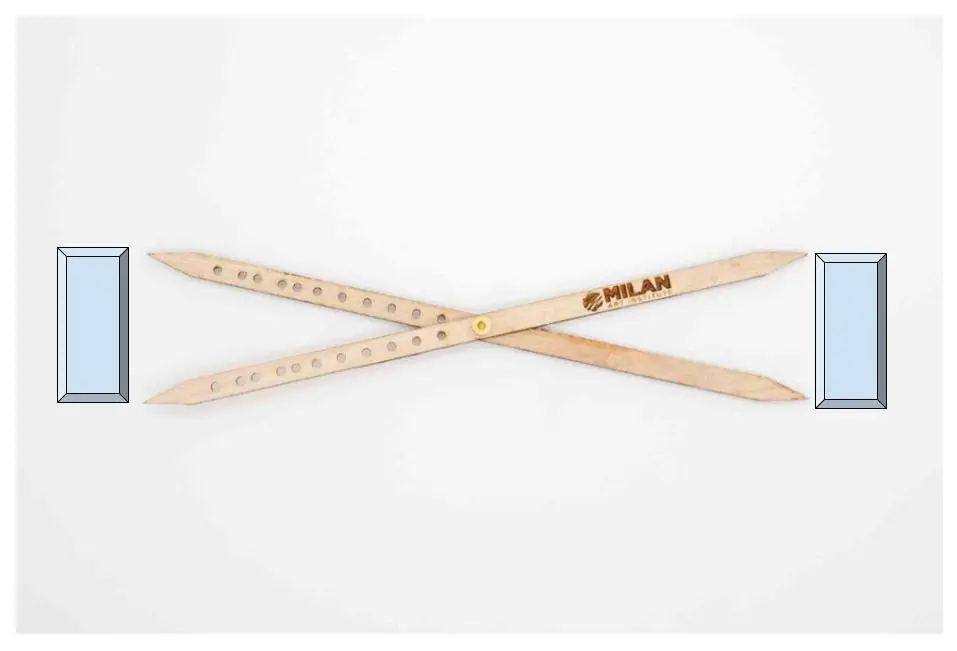
- Pivot toward the tips: your drawing comes out larger. Move the nut and bolt closer to the small tip end and the large end opens wider for any given measurement, so your drawing scales up from the reference.
- Pivot toward the center: your drawing comes out smaller. Slide the pivot back toward the middle and the ratio shrinks, so the drawing ends up smaller than what you measured.
- Pivot at the exact center: same size. With the pivot dead center, both ends match, and your drawing comes out the same size as your reference.
The small end always measures your reference. The large end always measures your drawing. Once that clicks, the whole tool makes sense: you open the small end against your subject, and the large end tells you exactly how far to mark on your paper or canvas.
How do you use a proportional divider step by step?
To use a proportional divider, set the ratio first, then measure point to point between your reference and your drawing. It is a simple, repeatable rhythm, and after a few measurements it becomes second nature. Here is the sequence.
- Choose your size ratio. Decide whether your drawing will be the same size as the reference, larger, or smaller, then slide the pivot to match. Center for same size, toward the tips for larger, toward the center for smaller.
- Measure the reference with the small end. Open the small end to span a distance on your reference, for example the width of a shoe or the gap between two features. The arms hold that setting.
- Read the matching distance on the large end. Because the pivot fixes the ratio, the large end is now open to the correct distance for your drawing automatically.
- Mark that length on your drawing. Touch the large end to your paper or canvas and mark both points. That distance is now in correct proportion.
- Work around the subject point to point. Repeat for the next relationship, then the next, building your drawing from accurate measurements rather than guesses. Lay in the big distances first, then the smaller ones.
Remember the one rule that ties it all together: the small end measures the reference, the large end measures the drawing, and both ends represent the same thing, just at different sizes.
Can you use a proportional divider with a live model or still life?
Yes. A proportional divider is not limited to photos. We have used the word reference throughout for simplicity, but you can measure a live model or a still life you have set up in exactly the same way. The tool does not care whether your subject is printed on paper or sitting on a table in front of you.
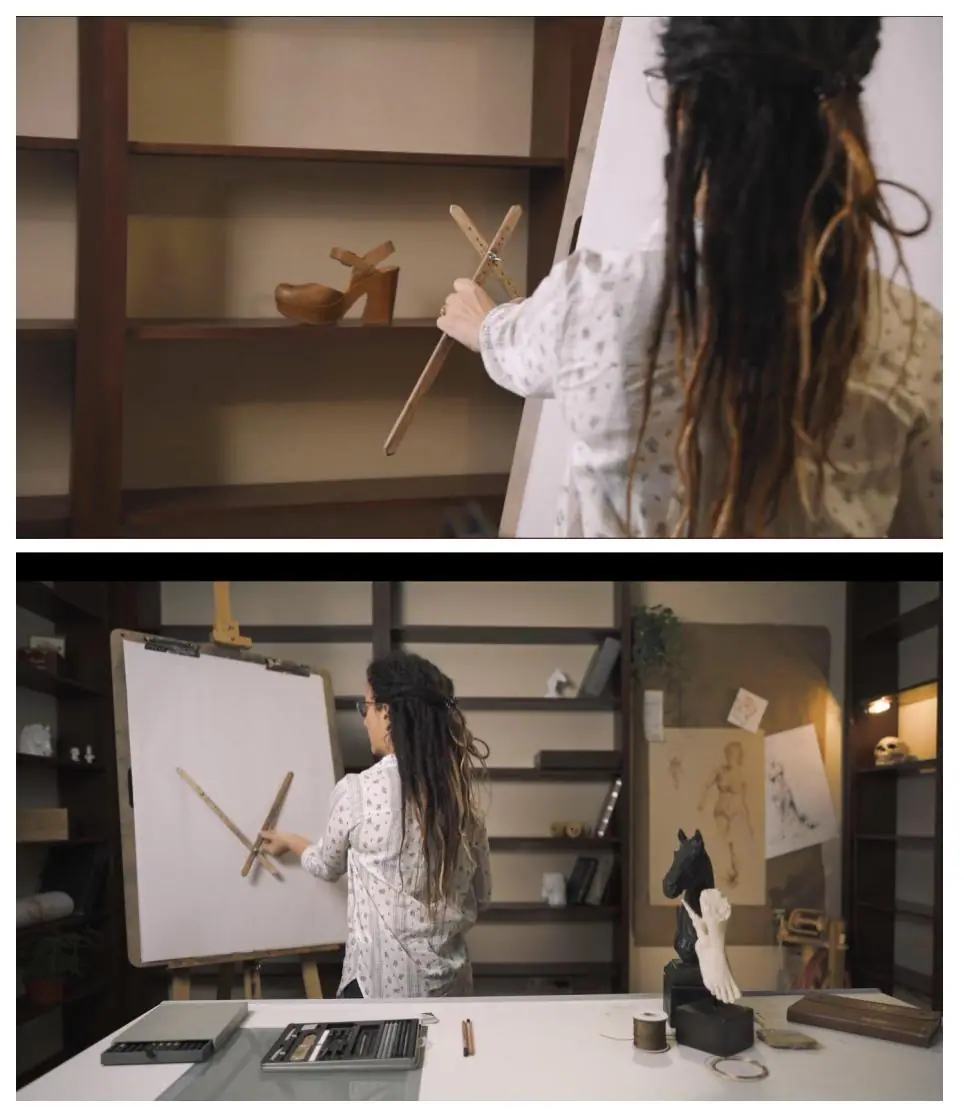
Picture measuring a real shoe. You hold the small end up to the actual shoe and open it to span the length you want. Then you turn to your paper, and the large end shows you that same length scaled to your drawing, even when the drawn shoe is bigger than the real one. The proportions stay locked. This is why the tool is just as at home in a still life setup or a life drawing session as it is at a desk with a photo, and it pairs naturally with the observation habit you build through everyday drawing and doodling.
What is the best proportional divider for artists?
The best proportional divider for most artists is a simple, sturdy metal one with a smooth sliding pivot and clearly marked arms. You do not need an engineering-grade instrument to draw accurately. What you need is a tool that holds its setting without drifting, has tips fine enough to land on a precise point, and slides cleanly when you reset the ratio. Reliability beats price here.
When you are shopping, look for arms that feel solid rather than flimsy, a pivot that tightens enough to stay put mid-drawing, and a clear scale so you can return to a ratio you liked. Beyond that, a proportional divider is a tool you will use for years, so a well-made basic model is a better buy than the cheapest one you can find. It is a small part of an accurate-drawing kit that also includes the right surface and the right paintbrush once you move into paint.
A simple way to practice
The fastest way to trust this tool is to prove it to yourself. Set the pivot to the exact center, pick a reference photo, and copy a single object to your paper at the same size, measuring three or four key distances before you draw any lines. Then slide the pivot toward the tips and redraw that same object larger, checking that every proportion still lines up. When the enlarged drawing matches the small reference, you will believe the tool, because you watched it work.
From there, take it into a real drawing. A self-portrait is a perfect testing ground because faces punish proportion errors so visibly, and our how to draw a self-portrait guide walks through the process the divider supports.
The bottom line on the proportional divider
Drawing accurately comes down to the right know-how and the right tools, and the proportional divider is one of the most useful tools you can own. It keeps your proportions correct from the first measurement to the last, lets you scale a drawing up or down without distortion, and turns the act of drawing from what you can see into something repeatable rather than mysterious. It is a small piece of metal that quietly unlocks a large skill.
If you want a structured, guided way to put accuracy into practice instead of just reading about it, our free Two Week Challenge is built to get a beginner making real drawings fast. And when you are ready to go deeper, the rest of the oil painting techniques collection is here to keep you moving.
Frequently asked questions
What is a proportional divider?
A proportional divider, also called a scale tool, is a measuring instrument artists use to keep a drawing or painting in correct proportion to a reference. It looks like a pair of scissors without handles, with a sliding pivot in the middle. The small end measures the reference and the large end measures the drawing, so both ends always represent the same object at different sizes.
How do you use a proportional divider for drawing?
Set the pivot for the size ratio you want, then measure a distance on your reference with the small end. The large end opens to the matching distance for your drawing. Mark that length on your paper or canvas, work point to point around your subject, and your drawing stays in proportion even when it is bigger or smaller than the reference.
How does the pivot point on a proportional divider work?
The pivot is a nut and bolt that slides along a slot in the arms, and where you place it sets the ratio between the two ends. Move it toward the tips and your drawing comes out larger than the reference. Move it toward the center and the drawing shrinks. Place it at the exact center and both ends match, so your drawing is the same size as the reference.
When should an artist use a proportional divider?
Use one any time you want to draw accurately from a reference, whether that is a photo, a live model, or a still life you set up. It is especially useful for getting relationships right, such as keeping the eyes in proportion to the nose and the edges of a face. It also lets you scale a drawing up or down while keeping every proportion true.
What is the best proportional divider for artists?
For most artists a simple metal proportional divider with a smooth sliding pivot and clearly marked arms is all you need. Look for sturdy arms that hold their setting without drifting and tips fine enough to land on a precise point. An expensive engineering-grade tool is not required to draw accurately, so reliability matters more than price.
What to practice this week
- Set the pivot to the exact center, measure one distance on a reference photo, and copy it to your paper at the same size to feel how point to point measuring works.
- Move the pivot toward the tips, then redraw the same reference larger and check that every proportion still matches.
- Practice on a single object first, a shoe, a mug, or a hand, measuring three or four key distances before you draw a single line.
Supplies used

About the author
More from Elli