Palette Knife Art: Why It Glows and What to Paint First
Thick ridges, clean color, edges that catch the light. Here's where that look comes from and how to get it on your own canvas.
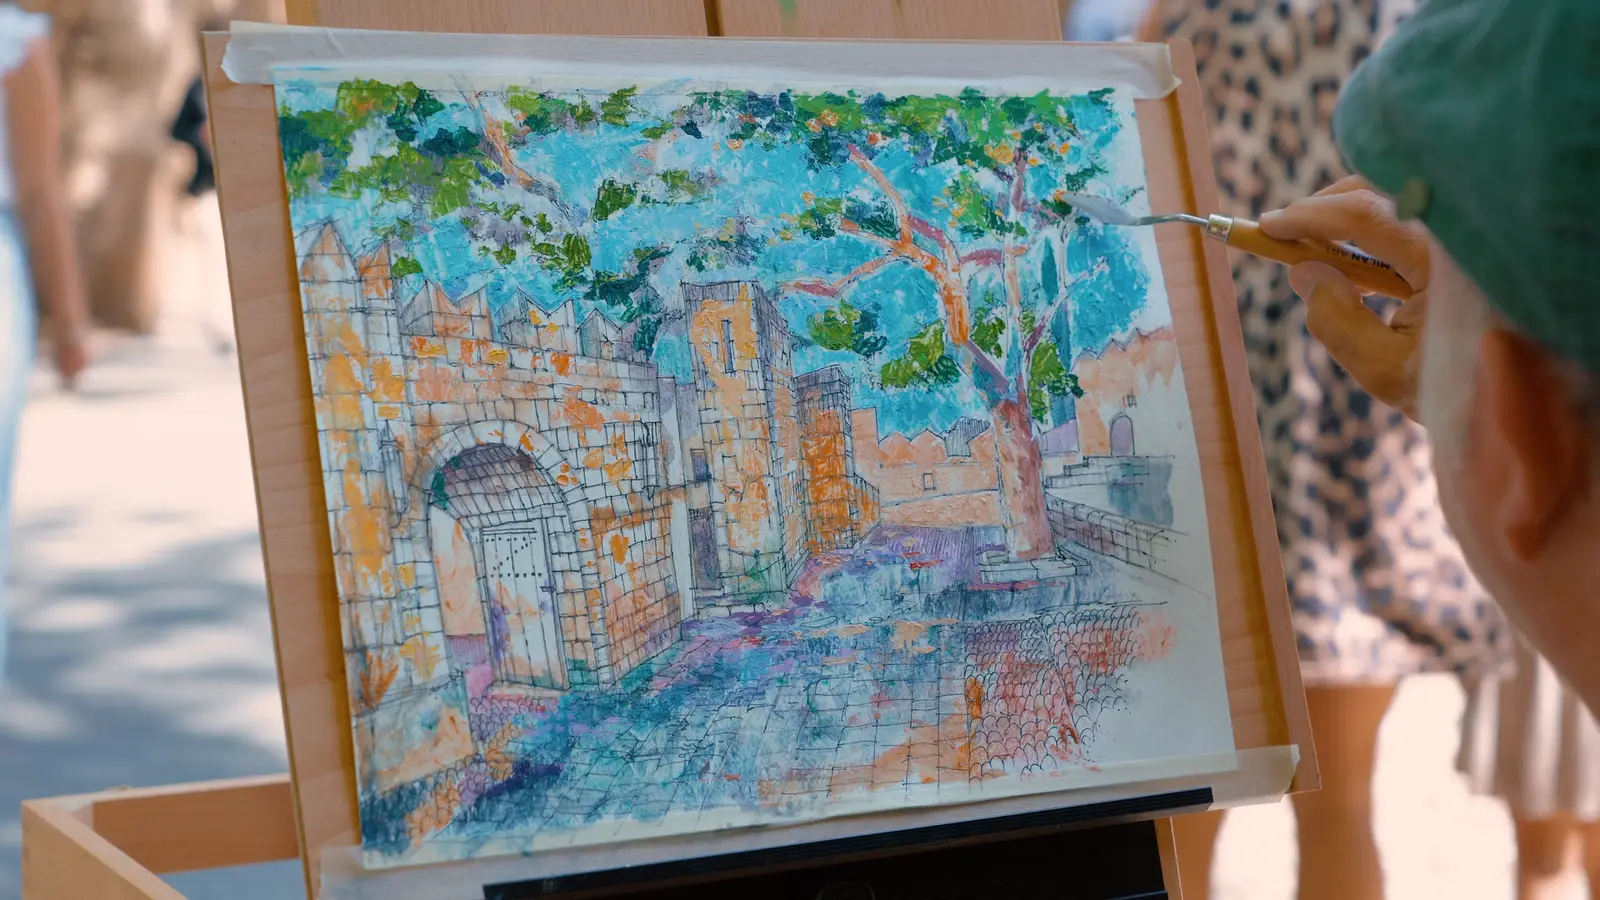
Palette knife art is painting made mostly with a flexible steel blade instead of a brush, and you can spot it from across a room. The color looks cleaner than brushwork, the strokes stand up off the canvas, and the edges catch light like the surface of a stone wall. That look comes from a handful of decisions you can learn in an afternoon, and once you’ve made them yourself, you’ll see them in every knife painting you pass.
Here’s what’s going on in a knife painting, who made the look famous, and how John Milan builds one from a pencil sketch to the final highlight, standing at a field easel in the old town of Rhodes, Greece.
What is palette knife art?
Palette knife art is any painting where the knife, rather than the brush, does most of the laying down, spreading, carving and scraping of paint. A knife has no bristles, so it can’t scrub one color into the next. Each stroke sits on the canvas as a clean slab of color with a ridge along its edge.
Two things give knife paintings their character. The first is clean color: two strokes can sit side by side, a warm orange against a cool teal, and stay distinct, so the eye mixes them instead of the canvas. The second is relief. Thick paint casts real shadows of its own, which means part of the light in a knife painting is physical light bouncing off actual ridges of paint. When the paint is laid on thick enough to stand up like that, painters call it impasto.
If you want the full list of strokes (edge loading, frosting, carving, scumbling and the rest), our guide to palette knife painting techniques walks through all ten. This post is about the art itself: why it looks the way it does, and how a finished knife painting gets built.
Who made palette knife art famous?
Gustave Courbet is the name most painters think of first, because heavy use of the palette knife became one of the hallmarks of his painting. In landscapes like The Source of the Loue (1864), now at the Metropolitan Museum of Art, he troweled paint onto the canvas so the rock face reads rough and craggy while the water reads as falling lace, and he did it by changing how he moved the blade from one surface to the next.
John Constable got there a few decades earlier in England. Tate’s conservators describe how he used a palette knife alongside his brushes to make surfaces that are thick and craggy in one area and thin and fluid in the next, matching the textures he saw in nature. English critics called those passages unfinished. French collectors loved them.
Constable kept his brushes in hand the whole time, and that matters for you, too.
Is it cheating to use a brush in a palette knife painting?
No, and John is emphatic about it: using a brush with a palette knife isn’t cheating, and plenty of people wrongly assume it is. In his Rhodes demonstration he brushes the first transparent layers on, then switches to a small knife for texture and light. In his studio demo he puts it even more simply: the knife can be your tool for every painting, but the painting doesn’t have to be called a palette knife painting or a brush painting. At that point you’re working in mixed media.
That frees you from a purity test nobody is grading. Use the brush where you want thin, soaking color and soft transitions. Use the knife where you want clean slabs, raised texture and highlights that sparkle. The art comes from the contrast between the two.
Why do palette knife paintings seem to glow?
Knife paintings glow because the darks go down thin and transparent first, and the lights go on last, thick and opaque, right on top of them. Light passes through the transparent layer and bounces off the canvas, so the shadows stay rich instead of heavy. Then the thick highlights sit up on the surface where real light hits them.
John says it plainly while he paints: to capture the light, you need your darks in first, then you layer in the highlights. In Rhodes he starts the stonework and ground with transparent purples and teals for the shadows, then moves to opaque paint mixed with wax for the mid tones, and only then goes in for the bright details over the shadows. The stones end up bright orange against teal and purple shadow, and it’s that temperature contrast, warm light over cool dark, that makes the wall look sunlit.
He also uses the knife to bounce light around the painting, moving from color to color across the canvas so the sunlight feels like it’s everywhere at once. The finish is a push and a pull: shadows down, highlights back up, checking against the scene (or your photograph of it) until it feels done.
How does John Milan build a palette knife painting?
John builds a knife painting in layers, from a drawing sealed under gel medium to thick highlights on top. Here’s the sequence from his Rhodes demonstration, painted outdoors in a busy stone corridor that he chose on purpose, to show you can paint anywhere.
- Sketch the scene and secure it. He draws the gate in pencil and graphite, goes over it with ink, then brushes a water-based gel medium over everything and lets it dry in the sun. Tape the paper down so the wind can’t move it.
- Brush on transparent color. Thin, transparent paint goes in first to capture the shadows, with the light source saved as the area of interest.
- Switch to the knife for transparent texture. With a miniature knife he lays purplish transparent color into the stonework and ground, making marks that build texture.
- Mix opaque color with wax and a drying medium. Mid tones go on next, thicker and opaque, with cold wax and Galkyd mixed in so they set faster.
- Patch in the textures. For the bricks and stones he lays down patches of cool and warm color and lets them bounce along. His words: it doesn’t have to be so prim and perfect.
- Scrape and lift. He scrapes into the blue sky to lift paint off in places, which opens up light without adding a single stroke.
- Finish with highlights. Bright touches go over the dark greens where sunlight hits the leaves, then a last round of push and pull between shadow and light.
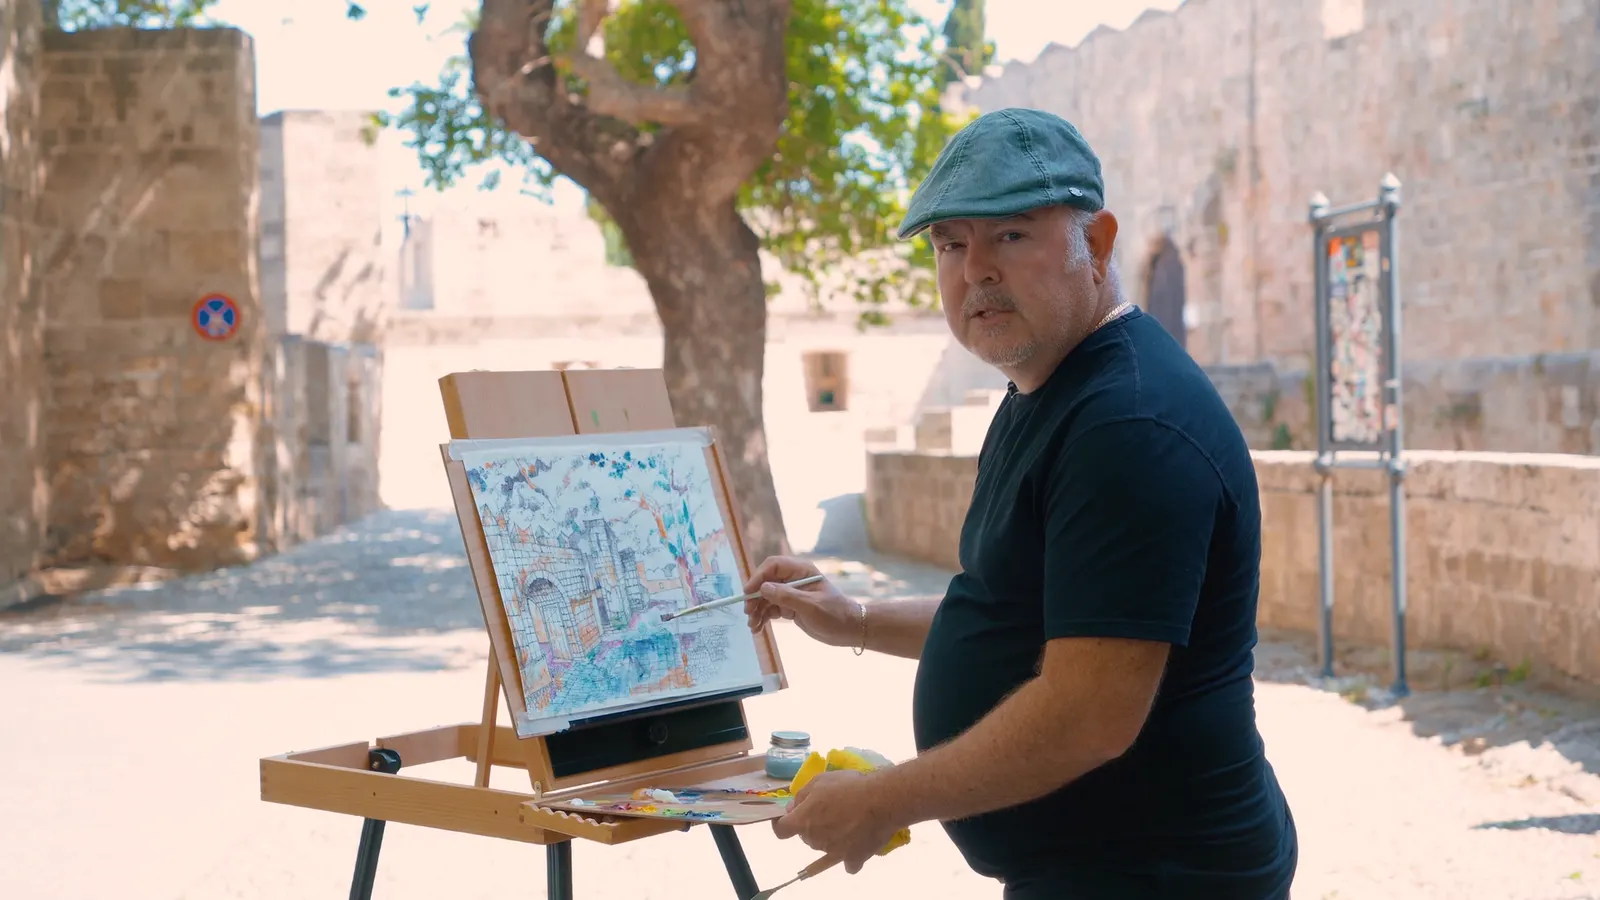
One small habit makes step 5 work. John turns the blade over at the end of a stroke to release the paint, and he likes to carry paint either as a small mound at the tip or as a long strand along the edge, so a single pass can lay down a variety of warms and cools. You’ll get a different mark from each, and the variety is what keeps a wall of stones from looking stamped.
What should you paint first with a palette knife?
Paint something rough and sunlit first. The knife describes stone, brick, bark, water and leaves catching light almost by itself, and it struggles with smooth skin and tiny detail. John’s demonstrations point to four good starting subjects.
A stone wall or an old doorway. Short patches of warm and cool color, laid side by side and left alone, read as stone at a distance. It’s forgiving because no single patch has to be right.
Light through leaves. Get the dark greens in first, then place small, bright, opaque strokes where the sun hits. John calls placing those highlights over the dark greens one of the most enjoyable parts of the painting, and it’s easy to see why once you try it: each small stroke of light makes the tree a little more sunlit.
A sky you can scrape. Lay in a sky, then scrape back into it with the edge of the blade. Every place you lift paint, whatever sits underneath shows through and lightens that passage.
An abstract of color fields. In his studio demo John paints over a textured surface of collage paper, gel medium and acrylic, drawing a guitar shape in purple on purple, then laying color fields over it with the knife. Once those fields set, he adds stripes and polka dots on top, and the drying medium is what lets him go over the color fields carefully without making muddy colors.
For more texture ideas beyond the knife, our guide to texture painting techniques covers molding paste, collage and more, and the knife fits into almost all of them.
What do you need to start making palette knife art?
You need two or three knives, a medium that thickens and speeds drying, and something to keep the blade clean. Here’s what John uses on camera.
- Knives in two shapes. He finished his studio painting with a teardrop knife and a diamond knife, and he travels with a miniature one. A small, slender knife gets into detail; a longer one makes big sweeping marks.
- Cold wax medium. Gamblin’s Cold Wax Medium or Dorland’s Wax Medium. Mixed into oil paint, it turns to something like cake frosting and builds up thick.
- A drying medium. Gamblin’s Galkyd lets the paint move around and dry faster than usual, which is what lets you layer in one session.
- Shop towels and mineral spirits. Wipe the blade clean between every color. John uses shop towels because they work like a cloth, plus a little mineral spirits for extra cleanness.
- A small set of colors. His studio palette is white, manganese blue, ultramarine blue, a vibrant pink and cadmium yellow light. A few primaries go a long way when the knife keeps every mix clean.
If you haven’t picked between oils and acrylics yet, both take to a knife. Acrylics dry fast on their own and thicken with molding paste; oils need the wax and drying medium above. Our guide to starting oil painting covers the rest of the oil setup.
How do you plan a series of palette knife paintings?
Plan the process before you paint, then do each stage to every canvas at once. Texture-heavy paintings take the most planning, because thick paste and wax need time to set before the next layer goes on.
In the Mastery Program’s lesson on planning a collection, the advice is to map out your process step by step before you start: build all the texture on every piece in one day, let it dry overnight, then move through washes, scumbling and opaque layers on all of them together. The final refinement layer goes two canvases at a time, so you mix a color once and put it on both, and the colors match across the pair. That one habit is the difference between a set of knife paintings that hang together on a wall and eight paintings that happen to share a frame shop.
Start with one wall and one knife
Pick a small canvas and a sunlit, textured subject, a doorway, a garden wall, a tree. Brush in the darks thin, let them set, then load the knife and lay three warm strokes of light across them without touching them again. When you see the ridge of paint catch the light from your window, you’ll understand palette knife art better than any description can explain it.
When you’re ready for guided practice with feedback on what you paint, the 2-Week Challenge is a good place to start, and the rest of our oil painting techniques are here whenever you want them.
Frequently asked questions
What is palette knife art called?
Palette knife painting is the usual name. When the paint is applied thick enough to stand up off the surface, it's also called impasto. Many knife paintings mix both, with thin layers underneath and thick impasto strokes on top.
Is it cheating to use a brush in a palette knife painting?
No. Most painters who work with a knife also use brushes, especially for the first thin layers. John Milan brushes on his transparent darks and then switches to the knife for texture and highlights. Use whichever tool gives you the mark you want.
What is the best subject for palette knife art?
Subjects with texture and strong light: stone walls, brick, tree bark, sunlit leaves, water, skies and bold abstracts. The knife describes rough surfaces and sparkling light far more easily than smooth skin or fine detail, so start there.
How do you make palette knife paintings dry faster?
Mix a drying medium into your oil paint. John Milan uses Gamblin's Galkyd with a cold wax medium such as Gamblin's or Dorland's. The wax thickens the paint and helps it set, so you can lay new color over a passage without turning it to mud.
What to practice this week
- Brush a thin, transparent dark over a small canvas, let it set, then pull three thick strokes of a light color across it with your knife without blending them in.
- Paint a patch of stone or brick wall using only short knife patches of warm and cool color, turning the blade over to release the paint at the end of each stroke.
- Make one small abstract of color fields with a knife, then add stripes and dots on top once the first layer has set.
Supplies used
About the author
More from ElliKeep learning