How to Varnish a Painting Without Ruining It (Oil and Acrylic)
A finished painting deserves a finish coat that protects it for generations, and the difference between a glowing surface and a ruined one comes down to a few simple rules.

To varnish a painting without ruining it, wait until the paint is completely dry, clean the surface, lay or stand the piece where drips cannot pool, and apply one thin even coat of a removable varnish made for your paint. That is the whole job, and getting it right is what separates a surface that glows from one that clumps, clouds, or cracks. Varnish protects your work for the long term, evens out the sheen, and deepens the color, and a removable varnish means a collector can have your painting cleaned generations from now without touching the paint underneath.
People have varnished paintings for thousands of years for exactly these reasons. The fear of ruining a finished piece is real, but almost every varnishing disaster comes from one of three avoidable mistakes: varnishing too soon, using too much, or using the wrong varnish for the paint. Avoid those three and the rest is straightforward.
Should you varnish an acrylic painting?
Yes, varnishing an acrylic painting is worth it, even though acrylic dries hard enough to survive without it. A varnish protects the surface from dust, moisture, and UV light, evens out the patchy sheen that acrylic often leaves between matte and glossy passages, and brings the colors back to the richness they had when the paint was wet. It also makes the piece easier to clean and signals to a collector that the work is finished with care.
The same logic applies to oil paintings, where varnish has the added job of unifying a surface that can dry unevenly as different pigments sink in at different rates. In both cases the varnish is a final protective layer, not a creative one, so it goes on only after the painting is truly done and fully dry.
Can you use oil varnish on acrylic, or acrylic varnish on oil?
This is the question that ruins more paintings than any other, so here is the clean rule. You can use oil varnish on an acrylic painting, but you should never use acrylic varnish on an oil painting.
Acrylic varnish on an oil painting cracks over time and shortens the life of the work, because oil paint keeps moving and aging for years and an acrylic film on top of it cannot move with it. Acrylic paintings are more forgiving: they accept both acrylic and oil based varnishes. That is why many artists keep a single removable oil varnish on hand. One bottle covers oil work and acrylic work alike, so there is nothing to mix up and no cracking to worry about.
Whichever you choose, choose a varnish that is removable. A removable varnish is what lets a conservator clean and refresh a painting decades later without lifting the paint, and it is part of what keeps your art in a family for generations.
What surfaces and paintings can be varnished?
Almost any rigid or sealed painting surface can be varnished: canvas, paper, wood, metal, and plexiglass all take varnish well. The key word is sealed. Before you varnish on canvas or paper, make sure the support is sealed with gesso so neither paint nor varnish bleeds through and shows on the back.
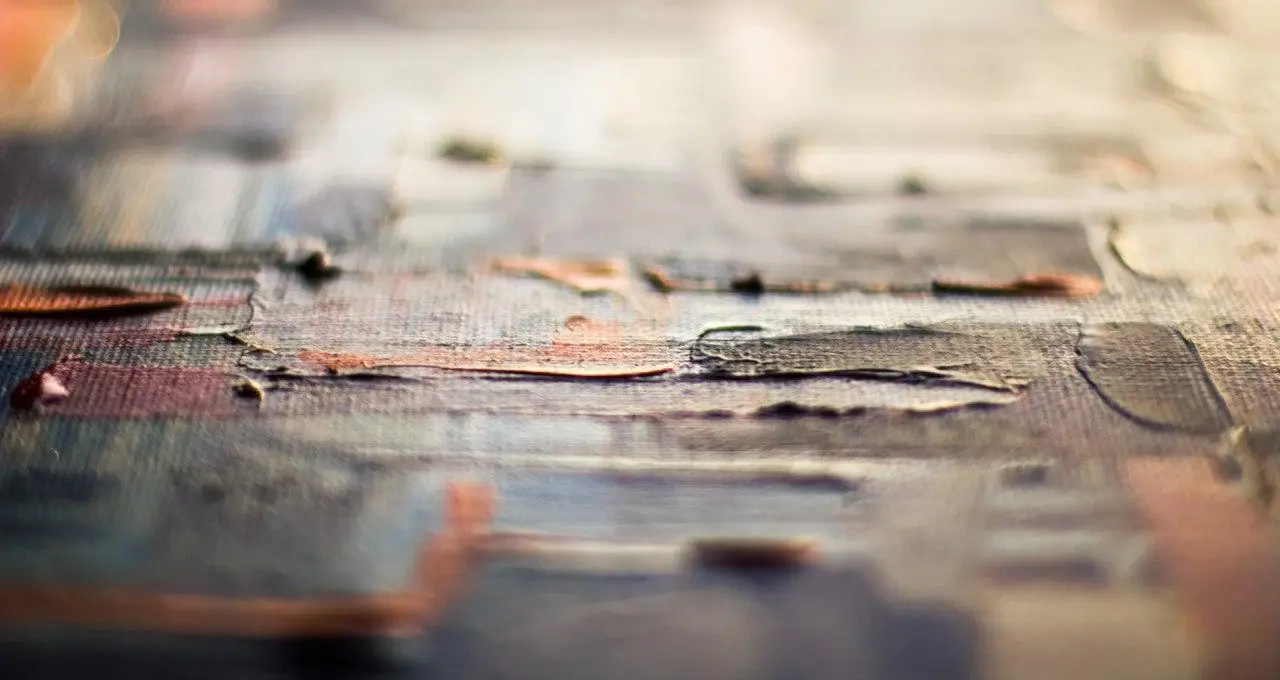
A few conditions matter more than the surface itself. The painting must be completely dry, because varnishing wet or tacky paint will smudge it. Heavily textured paintings need extra care: deep valleys and impasto ridges give varnish places to pool, so go especially thin and even on a textured surface to avoid clumping or buildup in the low spots. Used correctly, varnish makes acrylic paint look glossy and whole, and it gives oil paint a unified, finished surface.
What types of varnish should you use?
The four working categories are spray and liquid varnish for acrylic, and spray and liquid varnish for oil, and within those you choose a finish. Damar varnish is the classic and most popular choice for its simplicity and high gloss, and it can go on by brush or spray. If high gloss is not the look you want, a matte varnish lowers the shine and can gently lighten very dark values, while a satin varnish lands in between as a semi gloss. Retouch varnish is the odd one out: you use it to refresh a dull patch or even out the sheen on part of a painting rather than to coat the whole piece.
If you are looking for what to use instead of a full varnish on acrylic work, the closest honest answer is an isolation coat or a retouch varnish, both covered below. There is no shortcut that gives full protection without some clear coat going on, but those two give you lighter options. For a deeper look at the finishing stage in context, see our essential oil painting techniques.
How do you prepare a painting before varnishing?
Preparation is most of the job, and it takes only a few minutes. Confirm the painting is bone dry, then set up so that nothing can go wrong while the varnish is wet.
- Make sure the painting is completely dry so the surface cannot smudge.
- Wipe the surface gently with a clean lint free cloth to lift any dust or debris.
- Lay the painting flat on a level table or workbench, or stand it vertically, so drips cannot pool on the surface.
- If you plan to varnish the sides, rest the painting on small wooden blocks so it does not stick to the table.
- Pour or test only a small amount of varnish to start, so you never flood the surface.
- Work in a well ventilated room, or wear a mask with air filters, because varnish fumes are toxic.

What is an isolation coat, and do you need one?
An isolation coat is a thin layer of clear acrylic medium applied over a finished acrylic painting before varnish, and it makes future varnish removal far safer. The coat does not soak into the absorbent parts of the paint the way varnish would. It sits on top instead, forming a clean barrier so that when a varnish is removed later, it lifts away without pulling at the painting underneath.
You do not strictly need an isolation coat, but it is a smart step on acrylic work you care about, especially porous or matte passages where varnish could otherwise bond too tightly to remove cleanly.
How do you apply varnish with a brush?
To brush on varnish, use a large, clean, soft brush and lay the varnish in thin even strokes. A soft brush leaves fewer marks, and a clean one keeps stray dried paint from dragging into the wet coat. Work in one direction across the surface, keep the layer thin, and resist the urge to go back over an area that has started to set.
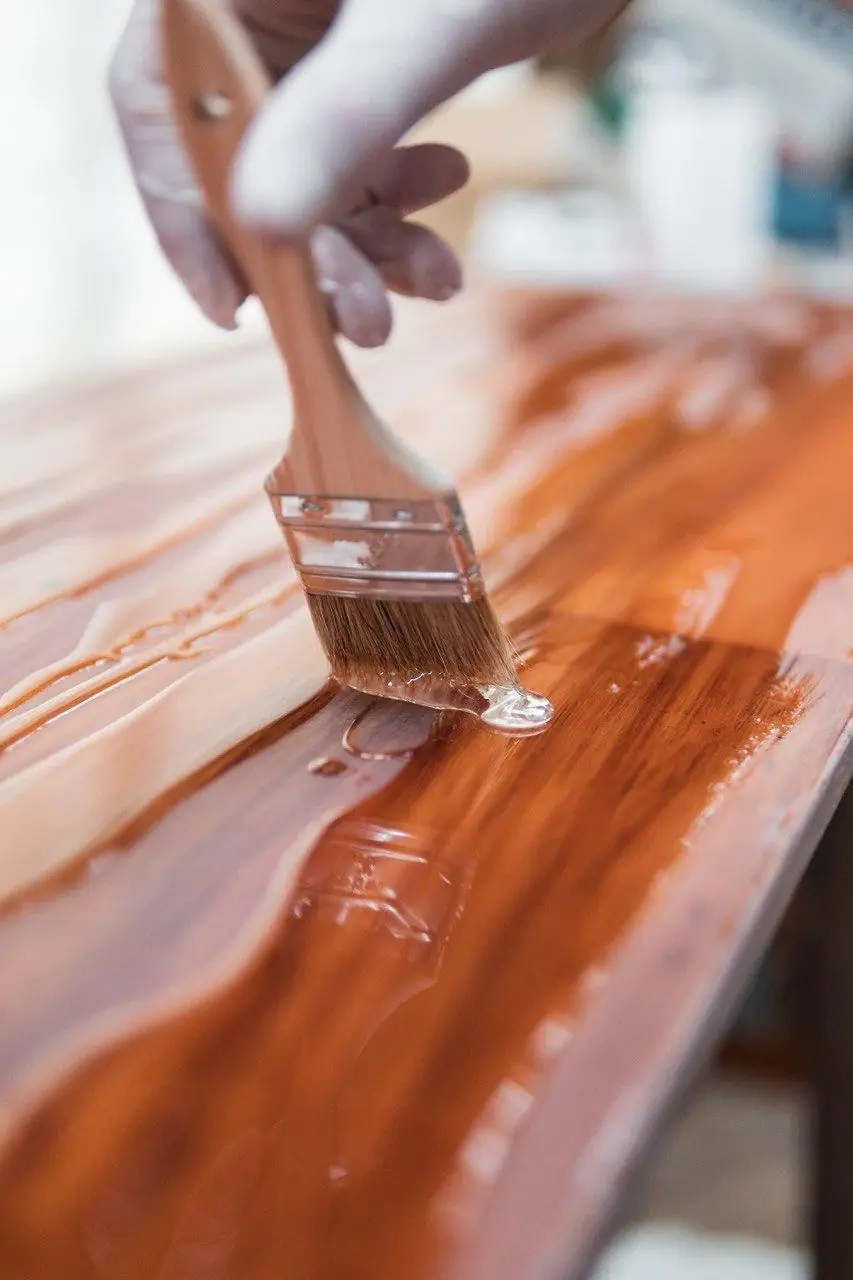
If you want to varnish the edges as well, the wooden blocks from your prep step keep the painting lifted so it does not stick down. A soft, wide brush is the single most useful tool here, so it is worth reading up on how to choose a paintbrush before you start.
How do you apply a spray varnish?
To spray varnish evenly, hold the can six to twelve inches from a clean, dry surface and pass it straight across in thin overlapping layers. Spray is the easiest way to get a smooth, even finish on a textured painting, since nothing touches the surface.
- Make sure the surface is clean and dry, then wipe it with a lint free cloth.
- Stand the painting vertically or lay it flat to limit dust settling on the wet coat.
- Shake the can for about ten seconds, or longer if the directions say so, to mix the varnish.
- Hold the can six to twelve inches away. Too close and the varnish pools or drips.
- Start each pass off the edge of the painting, move straight across, and release off the other edge so you never start or stop over the art.
- Work in thin layers, building up gloss with multiple coats rather than one heavy one.
- Check the nozzle for clogs as you go, and keep a spare nozzle, a nozzle cleaner, or a rag handy, since nozzles clog during long sprays.
How do you dry and cure a varnished painting?
Let a varnished painting dry flat in a clean, well ventilated, dust free space, and keep it away from wind. The fumes need somewhere to go, which is why ventilation matters as much for drying as it does for application. Before you walk away, double check the surface one last time for dust, lint, or any stray bug that could get sealed permanently into the finish.
Direct sunlight is the fastest way to dry a coat, but only somewhere protected. Drying outdoors on a windy day invites debris to land in the wet varnish, which is exactly the kind of small ruined detail this whole process exists to prevent. And once more, because it is the mistake that does the most damage: never put acrylic varnish on an oil painting.
The finish coat is the easy part
Varnishing is the simplest professional step you can add to your work, and it pays you back every time someone sees the painting glow on a wall. Wait for the paint to dry, keep the coat thin, match the varnish to your paint, and your art is protected for generations. If a varnish ever does go wrong, that is its own fixable problem, and our guide on how to start over on an oil painting covers recovering a surface you are not happy with.
If finishing your work has you thinking about everything that comes before it, the brushwork, the layers, the choices that make a painting worth protecting, the rest of our oil painting techniques collection is a good place to keep going.
Frequently asked questions
Can you use oil varnish on an acrylic painting?
Yes. Acrylic paintings can take both acrylic and oil based varnishes. Many artists keep a single removable oil varnish on hand precisely because it works on both oil and acrylic work, which means one bottle covers every painting without risk.
Can you use acrylic varnish on an oil painting?
No. Acrylic varnish on an oil painting tends to crack over time and shorten the life of the piece. Oil paint and oil based varnish move and age together, so an oil painting should get an oil based varnish.
Do you need to varnish an acrylic painting?
You do not have to, but it is worth it. A varnish protects acrylic work from dust, moisture, and UV light, evens out the sheen, and deepens the color. It also makes the surface easier to clean and keep in good condition for years.
What can you use instead of varnish on an acrylic painting?
If you want some protection without a full varnish, an isolation coat (a clear acrylic medium) seals the surface and can stand alone, though it is meant as a layer beneath varnish. For a small refresh, a retouch varnish revives a dull patch without recoating the whole piece.
What to practice this week
- Varnish a small finished study first, not your best piece, so you can feel how the varnish flows and how much is too much.
- Practice the spray motion with the can empty: start the stroke off the edge of the painting, pass straight across, and release off the other edge so you never start or stop over the art.
- Hold a finished painting to the light before and after a thin coat and note how the varnish unifies the sheen between your matte and glossy passages.
Supplies used

About the author
More from Elli