Basic Pastel Drawings: 5 Simple First Drawings That Teach You the Medium
Pastels reward a small subject, a dark sheet of paper and a light hand. Start with these five drawings and you'll learn how the medium behaves before you ever attempt a big piece.

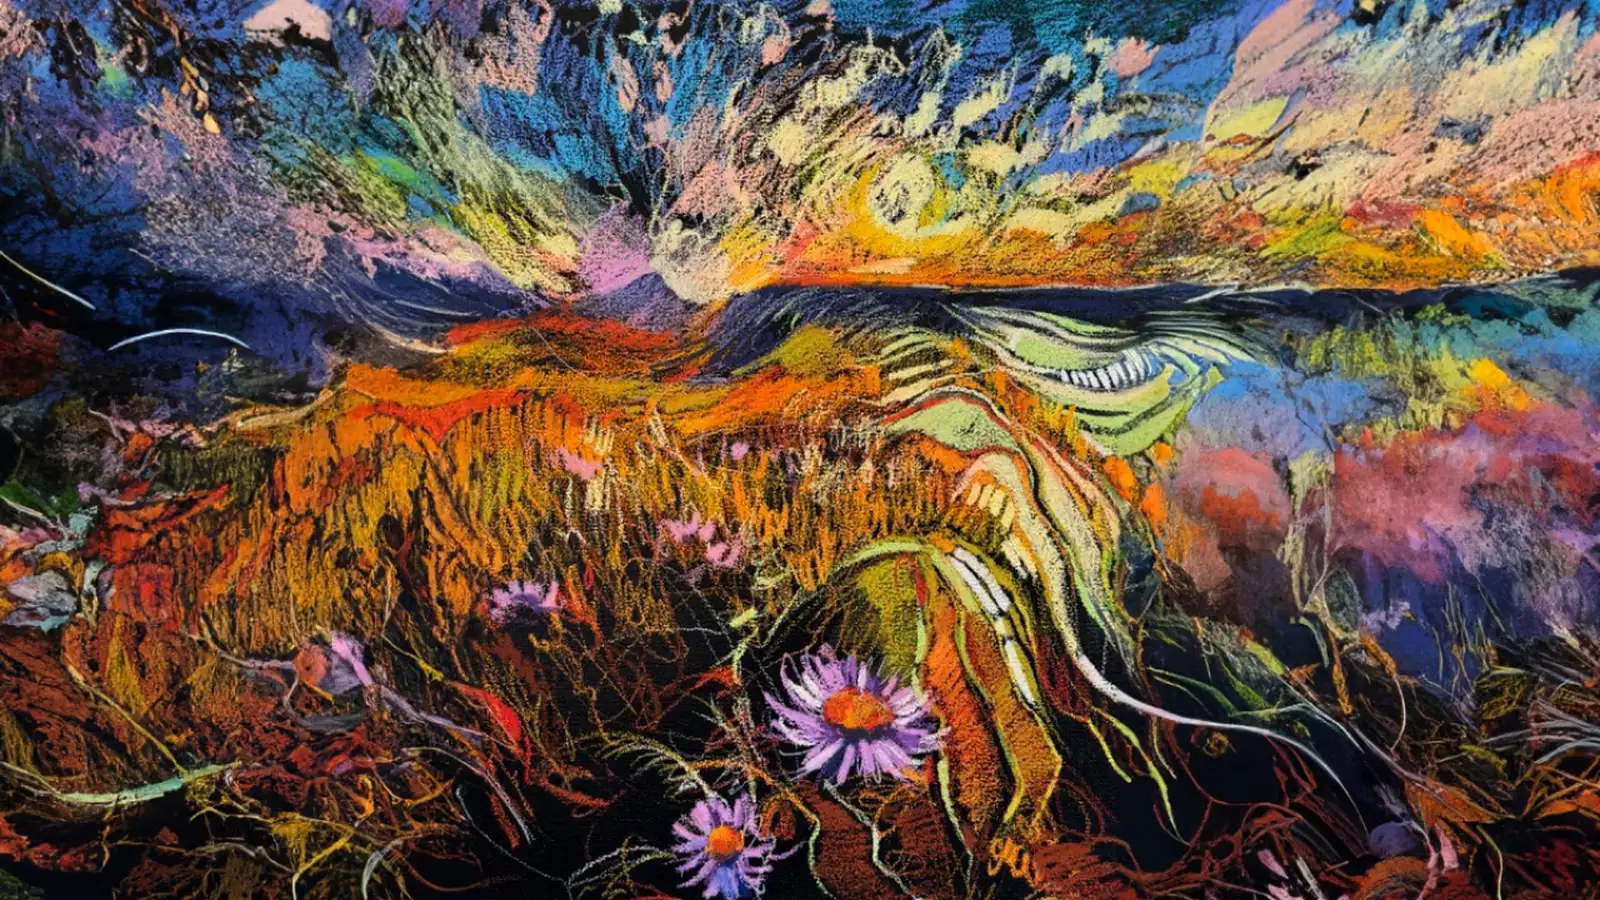
The best basic pastel drawings for beginners are small, bold subjects on dark paper: a page of practice marks, a single apple or pear, a few loose faces, a simple sunset landscape, and an abstracted flower. Each one takes under an hour, and each teaches you one thing pastels do that a pencil never will.
Pastels ask for a different kind of thinking than graphite. You’re drawing with color, pigment piles up on the paper, and most of it can’t be erased. That sounds intimidating until you learn three habits: press lightly first, leave some paper showing, and decide early where your lightest lights go. The five drawings below build those habits in order. They come from how our instructors teach pastel inside the Mastery Program and in Dimitra Milan’s Oil Pastels Reimagined class.
What makes a pastel drawing a good first drawing?
A good first pastel drawing has one clear subject, a dark or toned surface, and a small size you can finish in one sitting. That combination lets you focus on how the medium behaves instead of wrestling a complicated picture.
The dark surface matters more than most beginners expect. Pastels are mostly opaque, so bright color glows against black, and the paper hands you your darkest value for free. Our Mastery Program oil pastel lesson is blunt about white paper: it doesn’t recommend it for oil pastels at all, because the result tends to look like a child’s crayon drawing. On black paper the same sticks look rich and deliberate.
The other thing every first drawing should teach you is the limit of your paper. Pastel paper can only hold so much pigment. As long as a little paper shows through, you can still tweak the color. Once every fiber is covered, the surface stops grabbing new pigment and that area is done. Every drawing on this list is a lesson in spending that limit wisely.
What supplies do you need for basic pastel drawings?
You need a set of pastels, dark paper, and a few simple tools. Here’s a starter list:
- Pastels. Oil pastels are creamy and don’t dust; soft (chalk) pastels are powdery and blend easily. Either works for these exercises, and our guide to oil pastels vs chalk pastels will help you choose. A modest set is enough, because you’ll make new colors by layering one over another.
- Black or toned paper. Heavy paper holds up better and lasts longer. Dimitra works on thick, high-quality watercolor paper, around 300 lb, and it’s also sold in black. You can also paint any heavy sheet or canvas with black acrylic and let it dry.
- A kneaded eraser for lifting chalk pastel or a charcoal sketch line before you commit color.
- A blending stump or cotton swabs, plus clean fingers.
- Masking tape to hold the paper flat, which gives you more control for finer detail.
- Spray fixative or spray varnish to set the finished drawing.
Keep a couple of inexpensive sticks you don’t mind breaking. A broken stick used on its side lays down wide, soft color that no whole stick can make.
Drawing 1: How do you practice pastel marks?
Practice marks on a single sheet before you draw anything. Ten minutes of play here saves hours of frustration later, because you’ll know what each stick can do before it matters.
Divide a sheet of black paper into a grid of nine squares and make a different mark in each one:
- A line with the tip.
- A line with the long edge of a square stick.
- A wide sweep with a broken piece on its side.
- A twirl, rotating the stick as you draw so you use all its edges.
- A cluster of dots.
- Short hatched strokes.
- Long, loose strokes from the shoulder rather than the wrist.
- A light dusting with barely any pressure.
- A heavy, fully saturated press.
Compare squares 8 and 9. The light dusting still lets black show through and will accept more color. The heavy press is finished: it’s as bright as it will ever get, and nothing new will sit cleanly on it.
Our mark-making lesson puts it simply: every time you pick up a new tool, you get new marks. It also carries a warning worth keeping. Marks need a purpose. Each one should be rendering something, filling a space, balancing another area, or building contrast, or the drawing turns into overlapping noise.
Drawing 2: How do you draw a simple apple or pear in pastel?
Draw one piece of fruit on black paper in 15 to 20 minutes, working from midtones up to highlights. This is the exercise our oil pastel lesson recommends to anyone who has never used the medium, because it teaches you how hard to press and how much pigment the paper can take before you start a bigger piece.
- Dust in the main color. Squint at the fruit and find its base color, then cover the shape with a light dusting. Don’t press hard, and don’t fill the tooth. This first pass is the same as blocking in a painting.
- Leave the black showing in the shadow. The paper does the dark work for you. Only dust the shadow side lightly.
- Plant your highlight early, at half strength. This is the step that feels backwards. Place the highlight now, in a lighter midtone, while the paper still has room. If you wait until the rest is heavy, there won’t be enough tooth left for it to show.
- Mix by layering. Oil pastels mix on the paper. A chocolate brown layered with a dark blue gives you a deep, almost black dark that looks far richer than the black stick. Keep several sticks in your hand and keep switching, because spending too long on one color usually means you’re missing variety.
- Save pure white for last. Everybody gets a little too happy with white too soon. Bring it in only at the end, lightly, on top of the color you already planted underneath.
Resist finishing one small area at a time. You can’t judge a value until the values around it are in, so bring the whole fruit up together.
Drawing 3: How do you draw loose faces with chalk pastels?
Sketch three quick, simple faces on black paper with soft pastels, aiming for energy instead of likeness. This drawing teaches you to stay loose and let the paper work for you.
Start with light pressure and big shapes, turning the pastel in different directions as you go. Our chalk pastel lesson builds these faces from scribbled shapes, keeps thin, light backgrounds, then lays bolder color over the top. Let the black show through between strokes; it reads as shadow and gives the drawing its drama.
A few things to watch:
- Smudge lightly and on purpose. A fingertip softens a cheek beautifully, but a blending tool picks up other colors as it goes and can carry them where you don’t want them.
- Use your whole arm. Big, organic marks come from the shoulder. Tape the paper down when you want finer control.
- Fix it partway through. Soft pastel smudges when too many layers pile up. A light spray of fixative midway gives you a fresh surface to keep layering on.
When a face starts to look right, stop. Loose faces lose their life the moment you start polishing them.
Drawing 4: How do you draw a simple sunset landscape in pastel?
Draw a small sunset landscape on a dark surface, starting with the lightest part of the sky and working outward from light to dark. This is how Dimitra builds the dreamy oil pastel landscapes she teaches in her masterclass, and it’s a forgiving way to learn layering.
- Place the horizon off center. Put it about a quarter or three quarters of the way down, never across the middle, which makes a composition feel uncomfortable. A horizon with a little movement, like a mountain line, is more interesting than a ruler-straight one.
- Sketch loosely in a light color. Map the sun, the horizon and your foreground shapes with one light stick. It doesn’t need to be perfect.
- Start with the sun. Find the lightest area and lay those colors first, layering two or three light colors over each other. Dimitra goes light to dark with oil pastels because a light color dragged over a heavy dark turns muddy and loses its brightness.
- Work section by section. Finish the pinks in one area, then the yellows, then build values, instead of jumping around with every color at once.
- Keep the horizon soft. Dimitra teaches a clamshell effect: picture your two hands cupped, palms meeting at the horizon. That meeting point is the farthest thing in the picture, so keep it soft and low in contrast. Save the brightest color and the boldest marks for the top and bottom edges, where the sky and foreground come toward the viewer.
- Add pops of the complement. A few teal marks inside a big orange field make both colors sing.
Choose a focal point in the foreground, ideally lower left or lower right, and give it your most detail. Everything else can stay loose.
Drawing 5: How do you draw an abstracted flower in pastel?
Draw a flower as loose shapes and edges rather than as a botanical study. This last drawing teaches you to stay uncommitted early and make decisions about edges.
Our mark-making lesson begins this kind of piece by plotting the composition with a light pastel, because a light, powdery first layer is easy to change. That stage is for testing the color palette and play with shapes before anything is fixed. While you work, decide which edges you want sharp and which should melt into the background. A petal that dissolves at one side and stays crisp on the other will look more alive than one outlined all the way around.
Most important, don’t judge the drawing too early. The lesson is honest about this: the beginning of a loose piece can look like a disaster, and that’s normal, because it’s only the first of many layers. Keep building.
Why do pastel drawings turn muddy, and how do you avoid it?
Pastel drawings turn muddy when too many colors are rubbed together or when a light color is forced over a heavy, saturated dark. Three habits prevent almost all of it.
First, press lightly and build in thin layers. Dimitra’s advice to her class: if you go heavy early, make sure you really want that color there, because heavy pastel is close to permanent. Second, blend sparingly. Your fingers collect every color they touch, so blend with a clean finger or not at all, and let layering do most of your mixing. Third, plan your lights. Whether you work light to dark like Dimitra’s landscape or midtones up to highlights like the apple exercise, the rule underneath is the same: the lightest lights need clean paper to land on, so reserve space for them before the tooth fills up.
For a deeper list of methods, from scumbling to sgraffito, read our full guide to pastel techniques.
How do you keep a pastel drawing from smudging?
Seal it with a spray. For soft pastels, mist a workable fixative from a distance and build it up in several light coats, since one heavy, wet coat can shift the colors. Oil pastels behave differently, because they never really dry on their own. Dimitra sprays oil pastel pieces with a spray fixative or spray oil varnish, and in about 15 to 20 minutes the surface sets enough to handle or paint over with oils. Always spray; a brush-on varnish will drag the pastel.
One more rule if you plan to mix media: acrylic can go under oil pastel, never on top of it. Oil always comes last.
Where should you go after your first pastel drawings?
Once these five feel comfortable, pick the subject you’re most excited to draw, even if it looks hard. Our oil pastel lesson makes that point with a plate of sugared donuts chosen over an easier set of cups, because excitement carries you through the difficult parts and stretches your skills. Easy subjects keep you where you are.
Pastels also make a fast way to practice the basics of drawing: value, shape and edges all show up quickly when you’re drawing in color on a dark sheet. Pick one drawing from this list, give it twenty minutes tonight, and notice how differently you see the next piece of fruit on your counter. When you want to keep going with other artists and real feedback on what you make, the 2-Week Challenge is a great place to start.
Frequently asked questions
What should I draw first with pastels as a beginner?
Start with a single simple object on black or toned paper, such as an apple or a pear. It takes 15 to 20 minutes, and it teaches you the most important thing about pastels: how much pigment your paper can hold before it stops accepting more. Before that, spend ten minutes filling a page with practice marks so you know what each stick can do.
Is black paper good for beginner pastel drawings?
Yes. Pastels are mostly opaque, so bright colors glow against black or dark toned paper, and the paper itself gives you your darkest value for free. On white paper you're fighting the white the whole time, and oil pastels in particular tend to look like a child's crayon drawing. You can buy black paper or paint a heavy sheet with black acrylic.
Should I work light to dark or dark to light with pastels?
Plan your lights first, whichever order you work in. Pastel paper fills up, and once it's saturated a light color won't sit cleanly on top of a heavy dark. On black paper you block in midtones with a light dusting, place your highlights at medium strength while the paper still has tooth, and save pure white for the very end.
Do oil pastels dry?
Not on their own. Oil pastels stay soft and can smudge for a long time. Dimitra Milan sprays finished oil pastel pieces with a spray fixative or spray oil varnish, which sets the surface in about 15 to 20 minutes so it can be handled or painted over with oils. Use a spray, never a brush-on varnish, so you don't drag the pastel.
Can you erase oil pastel?
No. Oil pastel doesn't erase, so the only fix is to cover it. For a real emergency, paint over the area with black acrylic, let it dry, and draw on top. That's why beginners should press lightly at first and build color in thin layers.
What to practice this week
- Fill a sheet of black paper with a grid of nine squares and make a different mark in each: tip, edge, flat side, twirl, dots, short hatching, long sweeps, a light dusting and a heavy press.
- Draw one apple or pear on black paper in 20 minutes. Dust in the midtone, leave black showing in the shadow, and add white only in the last two minutes.
- Draw a sunset strip with the horizon a quarter of the way down: start with the sun, work outward light to dark, and keep the horizon soft while the top and bottom edges get your boldest color.
Supplies used
About the author
More from Elli